Admin: Working Patterns
Complete guide to creating and managing working patterns, defining weekly schedules, and assigning patterns to employees in CitoHR.
Overview
Working Patterns define the standard weekly schedule for employees, specifying how many hours they work each day of the week. You can create patterns like "Full-Time (40 hours)", "Part-Time (20 hours)", "4-Day Week", or custom schedules. These patterns are used for scheduling, leave calculations, and payroll processing.
Prerequisites
- You must have ADMIN role to manage working patterns
Accessing Working Patterns
- Log in to your CitoHR account with Admin credentials
- Click on your organization name in the header
- Select "People" from the admin menu
- Click "Working Patterns" from the People dropdown
- Or navigate directly to /admin/working-patterns

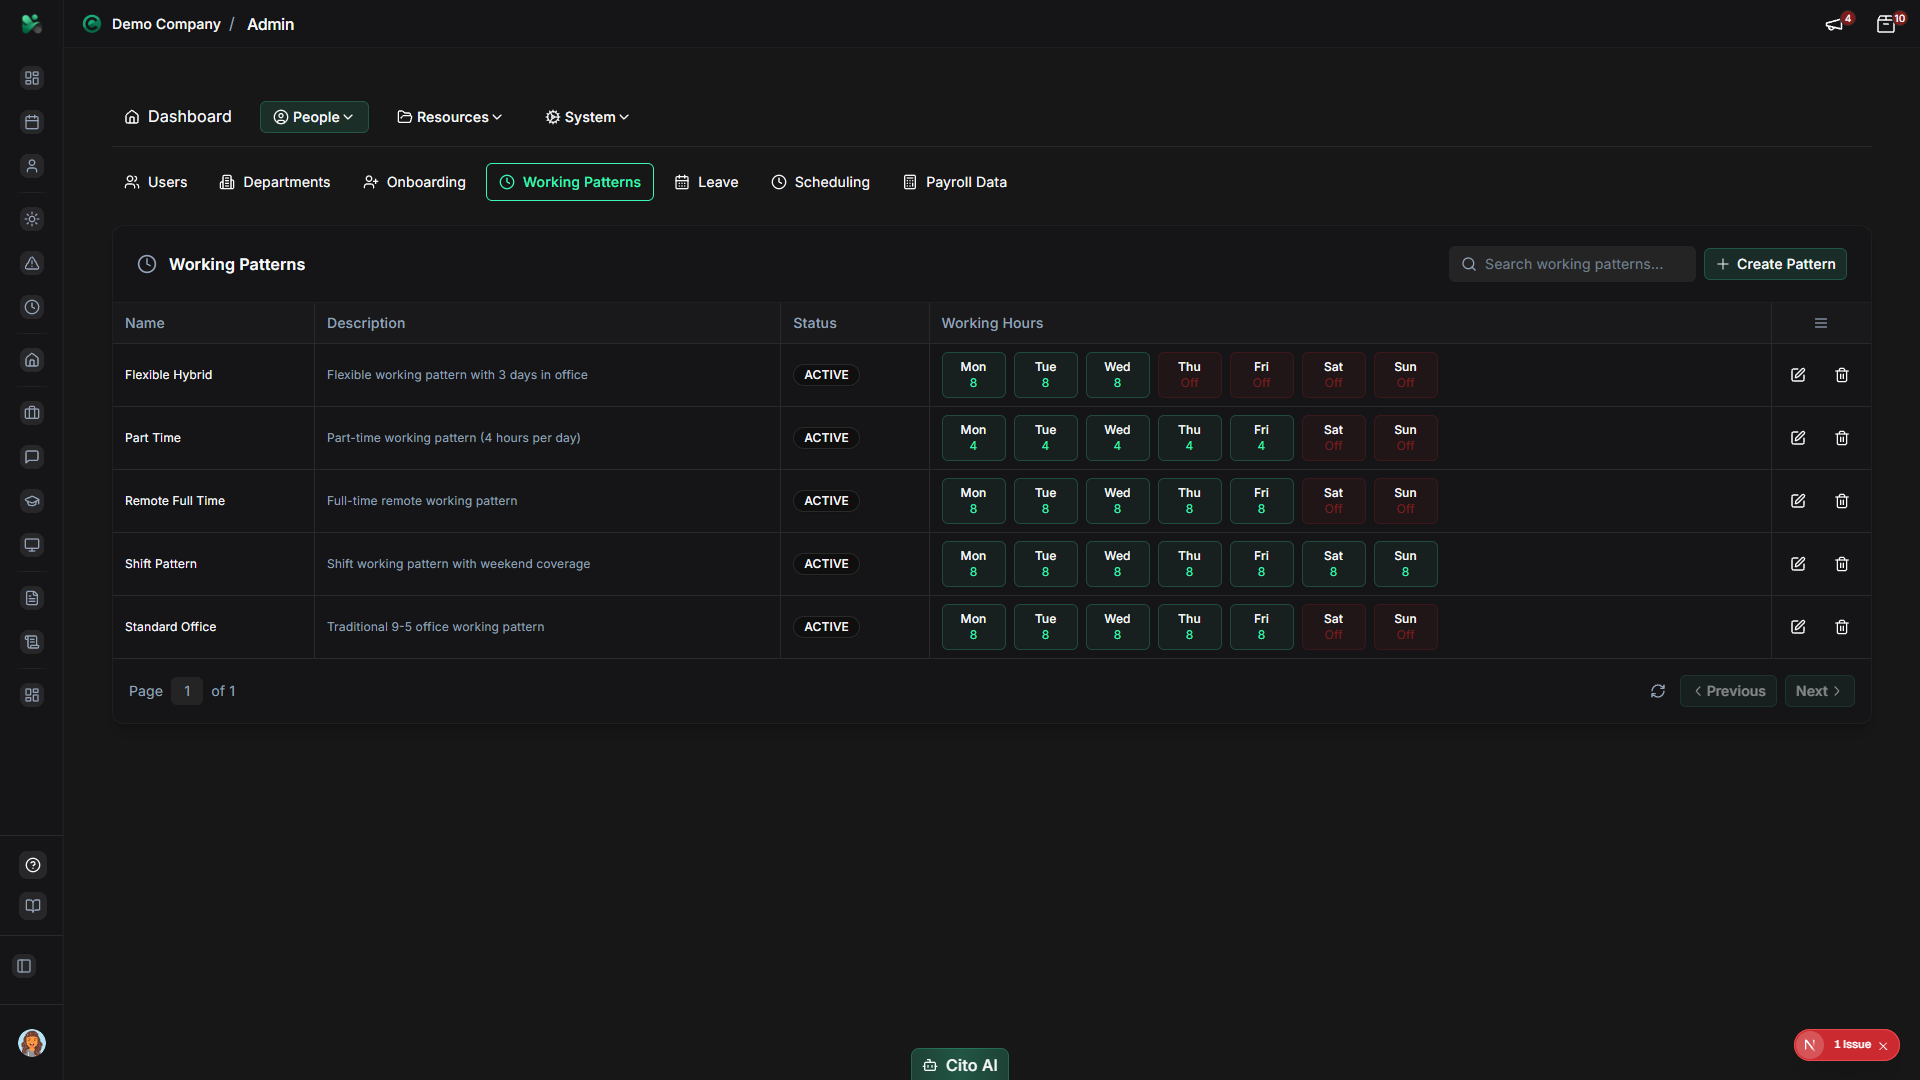
Viewing Working Patterns
See all working patterns in your organization:
- On the Working Patterns page, you'll see a table listing all patterns
- Each pattern shows:
- Pattern name
- Status (Active, Inactive, Archived)
- Weekly hours total
- Daily hours breakdown (Mon-Sun)
- Description
- Actions (Edit, Delete)
- Use the search bar to find specific patterns by name

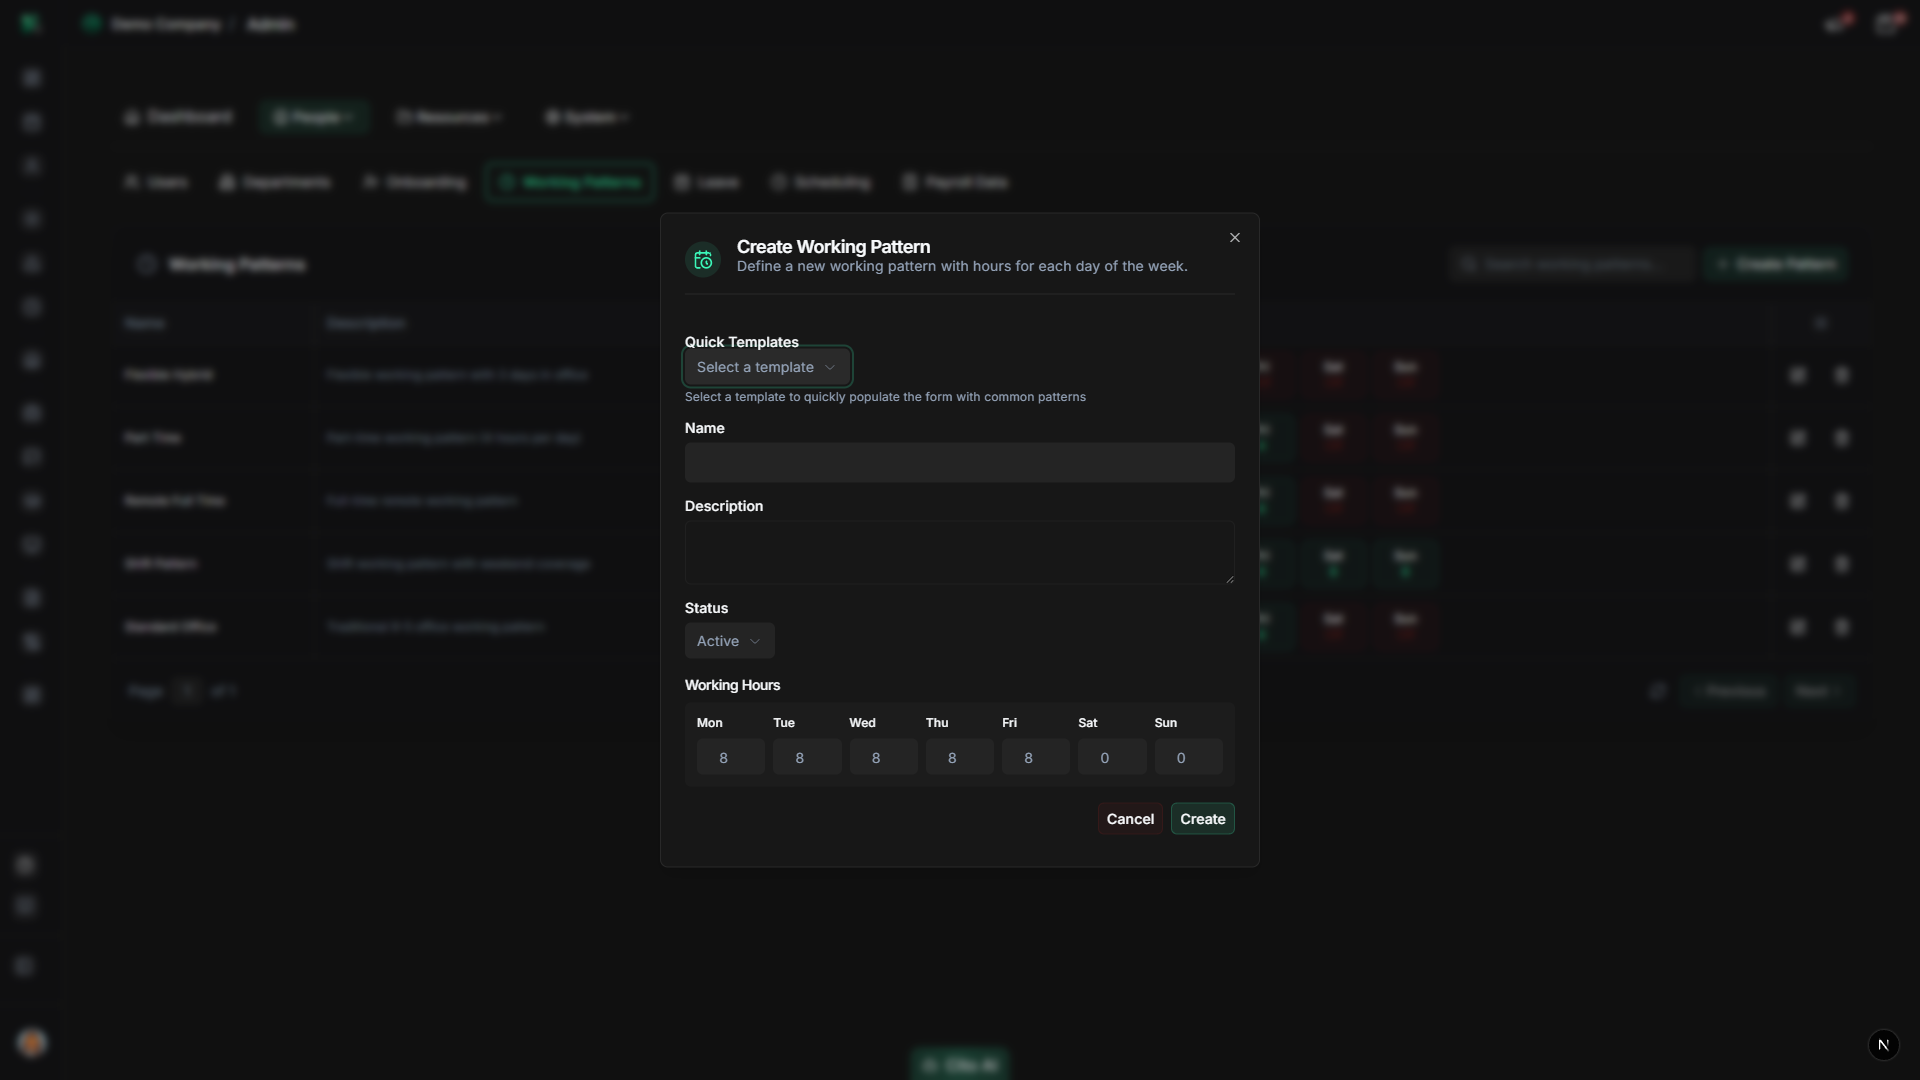
Creating a Working Pattern
Create a new working pattern:
- On the Working Patterns page, click the "Create Pattern" or "Add Pattern" button (usually top right, may show as a plus icon)
- The working pattern creation dialog will open
- Fill in the pattern details:
- Name - Enter a descriptive name (e.g., "Full-Time 40hrs", "Part-Time 20hrs", "4-Day Week")
- Description - Add an optional description explaining the pattern
- Status - Select Active, Inactive, or Archived
- Monday Hours - Enter hours worked on Monday (0-24)
- Tuesday Hours - Enter hours worked on Tuesday (0-24)
- Wednesday Hours - Enter hours worked on Wednesday (0-24)
- Thursday Hours - Enter hours worked on Thursday (0-24)
- Friday Hours - Enter hours worked on Friday (0-24)
- Saturday Hours - Enter hours worked on Saturday (0-24)
- Sunday Hours - Enter hours worked on Sunday (0-24)
- The total weekly hours will be calculated automatically
- Click "Create Pattern" or "Save"
- A success message will confirm the pattern was created
- The new pattern will appear in the patterns list
Tip
Create common patterns like "Full-Time (40hrs)", "Part-Time (20hrs)", and "4-Day Week" first. These can be reused for many employees,
saving time during user setup.
Editing a Working Pattern
Update an existing working pattern:
- On the Working Patterns page, find the pattern you want to edit
- Click the "Edit" button or icon next to the pattern
- The edit dialog will open with the current pattern information
- Update any fields as needed:
- Change the pattern name or description
- Modify daily hours for any day of the week
- Update the status (Active, Inactive, Archived)
- Click "Save" or "Update Pattern"
- The changes will be saved and reflected immediately

Warning
Changing a working pattern that is already assigned to employees will affect their schedules and leave calculations.
Consider creating a new pattern instead if you need a different schedule for new employees.
Deleting a Working Pattern
Remove a working pattern:
- On the Working Patterns page, find the pattern you want to delete
- Click the "Delete" button or icon next to the pattern
- A confirmation dialog will appear asking you to confirm the deletion
- Review the warning message carefully
- Click "Confirm" or "Delete" to proceed
- The pattern will be permanently removed
Warning
Deleting a working pattern may affect employees who are assigned to that pattern. Make sure to reassign employees to
other patterns before deleting, or be aware that employees may need to be reassigned after deletion.
Assigning a Working Pattern to a User
Assign a working pattern to an employee:
- Navigate to Admin > Users
- Find and open the user profile for the employee
- Navigate to the Employment section
- Look for the Working Pattern field
- Click the Working Pattern dropdown
- Select the appropriate pattern from the list
- Click "Save" to assign the pattern to the user
Working Pattern Statuses
Understanding pattern statuses:
- Active - The pattern is available for assignment to new employees
- Inactive - The pattern exists but cannot be assigned to new employees (existing assignments remain)
- Archived - The pattern is archived and typically not used (historical records preserved)
Tip
Use Inactive status for patterns you want to keep for historical purposes but don't want to assign to new employees.
Use Archived for old patterns that are no longer relevant.
Best Practices
- Create working patterns before creating users to streamline user setup
- Use clear, descriptive names that indicate the schedule (e.g., "Full-Time 40hrs Mon-Fri")
- Create common patterns first (Full-Time, Part-Time) before creating custom ones
- Set patterns to Inactive rather than deleting them if they might be needed for historical records
- Ensure total weekly hours are accurate for payroll and leave calculations
- Document any special patterns in the description field
Related Features
- Users - Assign working patterns to users during user creation or editing
- Scheduling - Working patterns are used for shift scheduling
- Leave - Working patterns affect leave accrual calculations
- Payroll Data - Working patterns determine standard hours for payroll