Admin: User Management
Complete guide to managing users, configuring employee settings, and administering user accounts in CitoHR.
Overview
The Admin User Management section provides comprehensive tools for creating, editing, and managing all user accounts in your organization. You can configure employment details, leave settings, job history, payroll data, and more from a centralized location.
Note
Prerequisites
- You must have ADMIN role to access User Management
- Departments should be set up before assigning users to departments
- Working patterns should be configured if you want to assign them during user creation
Accessing User Management
- Log in to your CitoHR account with Admin credentials
- Click on your organization name in the header
- Select "People" from the admin menu
- Click "Users" from the People dropdown
- Or navigate directly to /admin/users
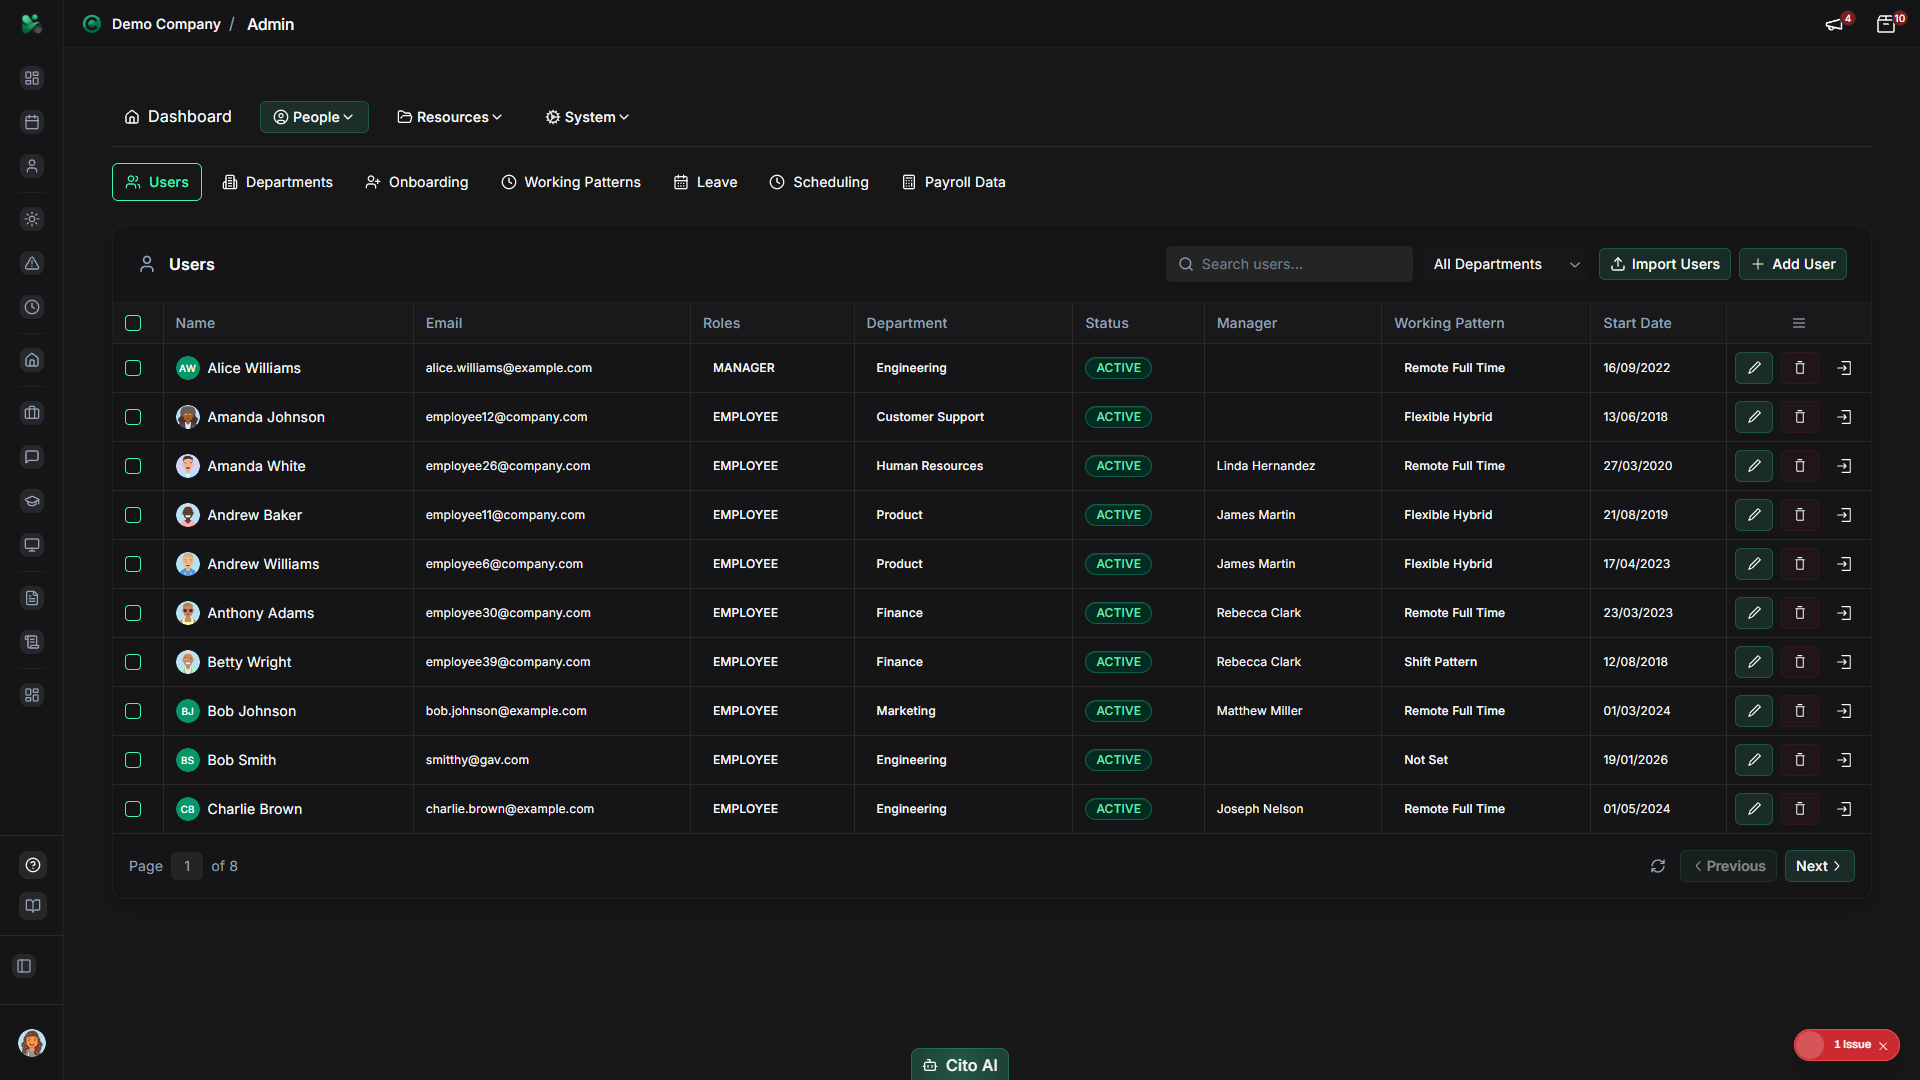
Viewing the Users List
See all users in your organization:
- On the Users page, you'll see a table showing all users with:
- User name and email
- Department
- Role (USER, MANAGER, ADMIN)
- Status (ACTIVE, INACTIVE, PENDING_APPROVAL)
- Last login date
- Actions (Edit, Delete, etc.)
- Use the search bar to find specific users by name or email
- Use filters to narrow results:
- By department
- By role
- By status
- Click on a user's name to open their detailed profile
Terminating Users
When an employee leaves, manage their account from the actions menu in the users list view.
- Navigate to Admin > Users
- Find the user in the list view
- Open the Actions menu for that user
- Select "Set Inactive" if you want to keep the record but prevent the user from accessing CitoHR
- Select "Delete" if you need to remove the user from the system
- Confirm the action when prompted
Note
Warning
Creating a New User
Add a new employee to the system:
- On the Users page, click the "Add User" button in the top right corner
- Fill in the Personal Information section:
- First Name (required) - Enter the employee's first name
- Last Name (required) - Enter the employee's last name
- Email address (required, must be unique) - Enter their work email
- Phone number (optional) - Enter contact number
- Configure Employment Details:
- Click the Department dropdown
- Select the department from the list
- Click the Manager dropdown (optional)
- Select the employee's manager if applicable
- Click the Role dropdown
- Select USER, MANAGER, or ADMIN
- Click the Working Pattern dropdown (optional)
- Select a working pattern if applicable
- Set Account Settings:
- Enter a password (or leave blank to send password reset email)
- Click the Status dropdown
- Select ACTIVE (user can log in immediately) or INACTIVE (requires approval)
- Toggle "Send notification email" if you want the user to be notified
- Click "Create User" to save
- A success message will appear confirming the user was created
Warning
Tip
Viewing a User Profile
- Navigate to the Users page
- Click on the user's name in the table
- The user profile will open, showing all available sections in tabs or a sidebar
- Navigate between sections to view different information:
- Personal - Basic personal information
- Employment - Job details and employment information
- Salary - Salary and compensation details
- Leave Settings - Leave balance, approvers, and leave configuration
- Job History - Employment history and position changes
- Documents - Attached documents
- Emergency Contacts - Emergency contact information
- Immigration - Right to work and visa information
- Expense Settings - Expense approvers and settings
Editing User Information
Update user information from the profile page:
- Open the user's profile by clicking their name
- Navigate to the section you want to edit
- Click the "Edit" button or click directly on editable fields
- Make your changes to the fields
- Click "Save" to apply changes
- A success message will confirm the update
Managing User Sections
Configure different aspects of a user's account:
Employment Section
- Open the user's profile
- Navigate to the "Employment" tab
- Edit employment details:
- Job title
- Department
- Manager
- Employment type (Full-time, Part-time, Contract, etc.)
- Start date
- End date (if applicable)
- Click "Save" to update
Salary Section
- Open the user's profile
- Navigate to the "Salary" tab
- View or edit salary information:
- Annual salary
- Pay frequency (Monthly, Weekly, etc.)
- Currency
- Effective date
- Click "Save" to update salary
Leave Settings Section
- Open the user's profile
- Navigate to the "Leave Settings" or "Leave" tab
- View leave balance and configure leave settings:
- View current leave balance
- Add leave adjustments (additional days, deductions, carry-over)
- Configure leave approvers
- View leave request history
- To add a leave adjustment:
- Click "Add Adjustment" or "Adjust Leave"
- Select adjustment type (Additional, Deduction, Carry Over, Other)
- Enter the number of days
- Enter a reason for the adjustment
- Set effective date range
- Click "Save"
Job History Section
- Open the user's profile
- Navigate to the "Job History" or "Jobs" tab
- View all job positions for this user
- To add a new job entry:
- Click "Add Job" or "New Position"
- Enter job title
- Select department
- Set start date
- Set end date (leave blank for current position)
- Enter employment type
- Enter salary (optional)
- Click "Save"
- To edit or delete a job entry, click the edit or delete button next to the job
Configuring Leave Approvers
Set up who can approve leave requests for a user:
- Open the user's profile
- Navigate to the "Approval" tab
- Review the approver sections for Leave, Expense, and Timesheet
- In the "Leave Approvers" section, click "Add Approver"
- In the approver selection dialog:
- Start typing the approver's name or email
- Select the approver from the filtered results (only users with MANAGER or ADMIN roles appear)
- Click "Add" or "Save" to add the approver
- Repeat to add additional approvers if needed
Tip
Note
Important
Managing User Documents
Upload and manage documents for a user:
- Open the user's profile
- Navigate to the "Documents" tab
- View all documents attached to this user
- To upload a new document:
- Click "Upload Document" or "Add Document"
- Select the file from your device
- Enter document name and category
- Set visibility (Private, Manager, HR, Company)
- Click "Upload"
- To delete a document, click the delete button next to it
Searching and Filtering Users
Find specific users quickly:
- On the Users page, locate the search bar at the top
- Type the user's name or email address to search
- Use the Department dropdown to filter by department
- Use the Status filter to show only Active, Inactive, or Pending Approval users
- Use the Role filter to show only Users, Managers, or Admins
- Filters can be combined for more specific searches
Bulk Operations
Perform actions on multiple users at once:
- On the Users page, select multiple users using the checkboxes in the first column
- Click the "Bulk Actions" button that appears
- Choose an action from the dropdown:
- Export - Export selected users to CSV
- Approve - Approve multiple pending users
- Deactivate - Deactivate multiple users
- Delete - Delete multiple users (use with caution)
- Confirm the action in the dialog that appears
Important
Approving Users
Activate user accounts that are pending approval:
- Navigate to the Users page
- Find users with INACTIVE or PENDING_APPROVAL status
- Click the "Approve" button next to the user's name
- Confirm the approval in the dialog that appears
- The user's status will change to ACTIVE and they can log in immediately
Warning
Sending Password Reset
- Open the user's profile
- Click the "Send Password Reset" button in the user header section
- Confirm that you want to send the password reset email
- The user will receive an email with instructions to reset their password
Note
Understanding User Statuses
Users can have one of the following statuses:
- ACTIVE - User can log in and use the system normally
- INACTIVE - User account exists but requires admin approval before access
- PENDING_APPROVAL - User has registered but is waiting for admin approval
- ON_LEAVE - User is currently on leave
- TERMINATED - User's employment has ended
Related Features
- Departments - Set up departments before assigning users
- Working Patterns - Configure work schedules to assign to users
- Leave - Configure leave policies that affect users
- My Profile - See what users can view and edit in their own profiles