Admin: Departments
Complete guide to creating and managing departments in CitoHR.
Overview
Departments help organize your organizational structure. You can create departments, assign employees to departments, and manage department information. Departments are essential for organizing users, leave policies, and reporting.
Prerequisites
- You must have ADMIN role to manage departments
Accessing Departments Management
- Log in to your CitoHR account with Admin credentials
- Click on your organization name in the header
- Select "People" from the admin menu
- Click "Departments" from the People dropdown
- Or navigate directly to /admin/departments

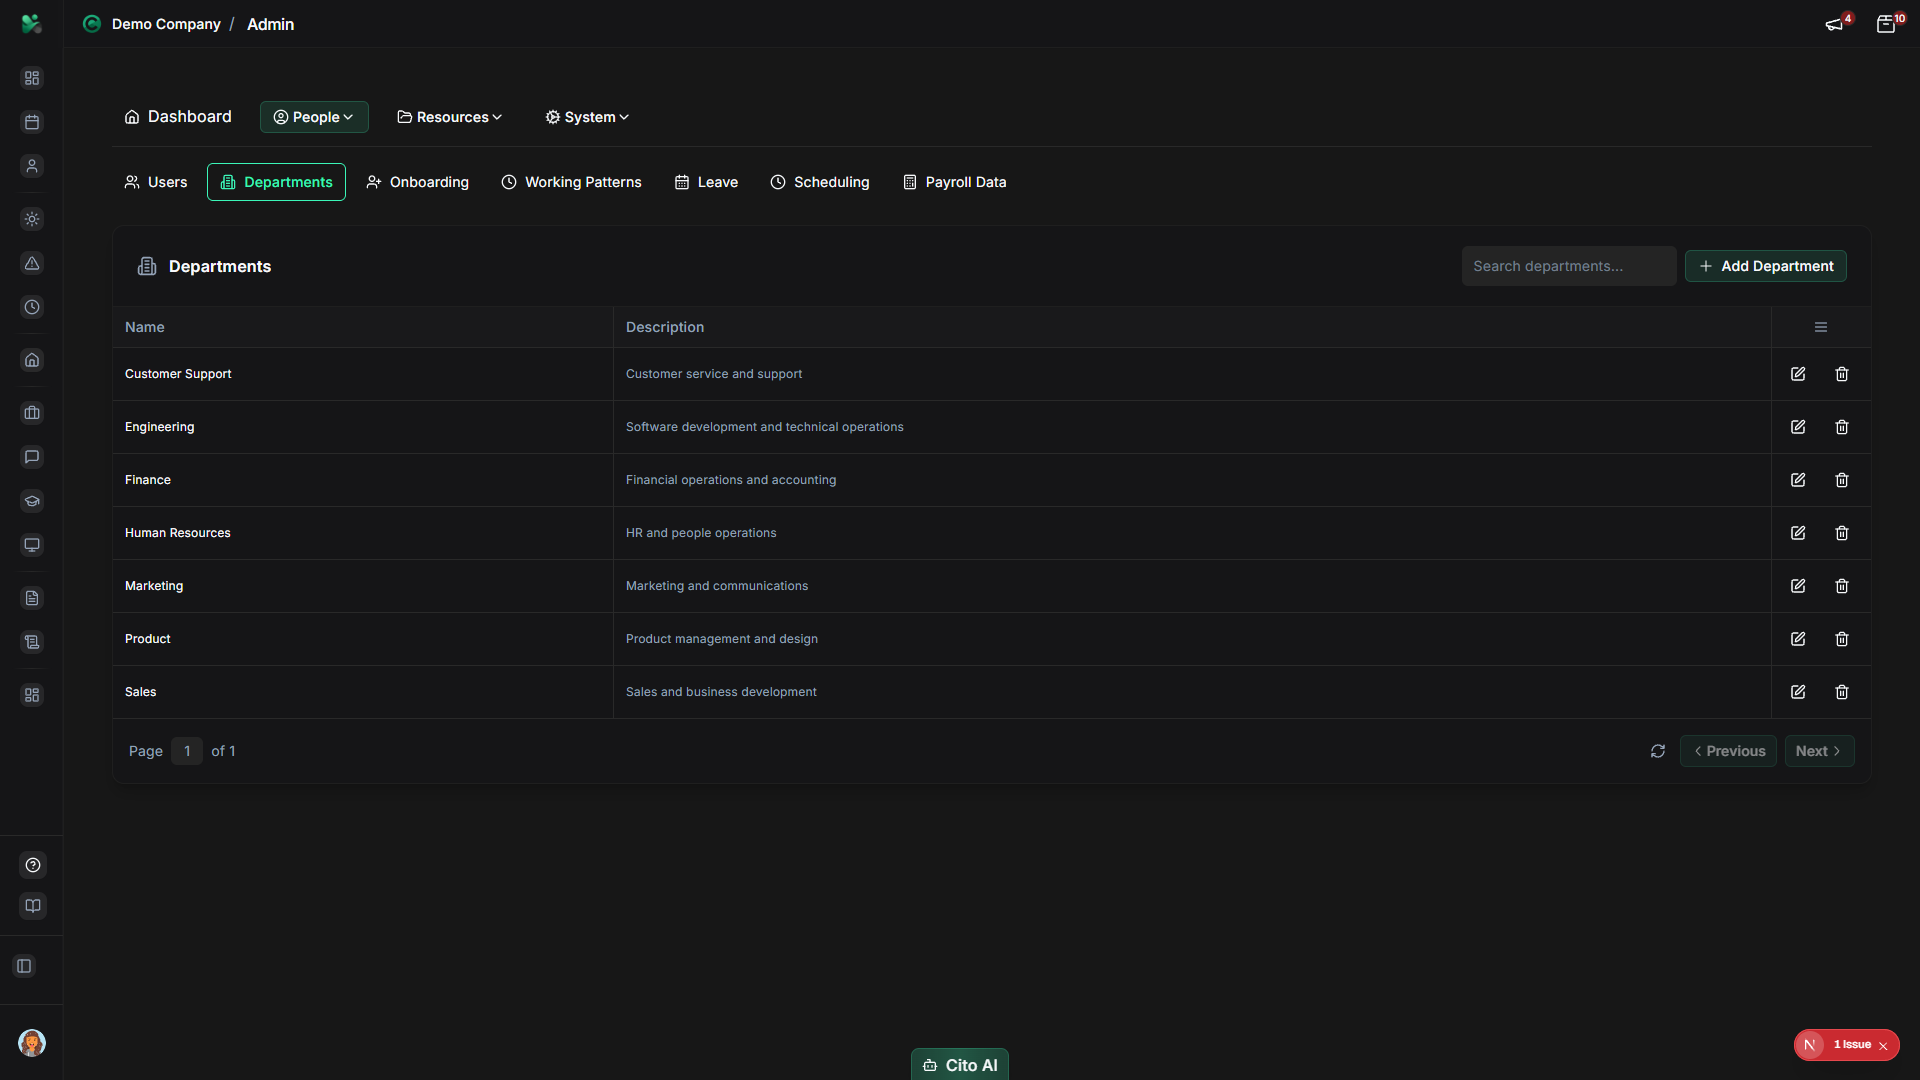
Viewing Departments
See all departments in your organization:
- On the Departments page, you'll see a table listing all departments
- Each department shows:
- Department name
- Description
- Number of employees (if displayed)
- Actions (Edit, Delete)
- Use the search bar to find specific departments by name

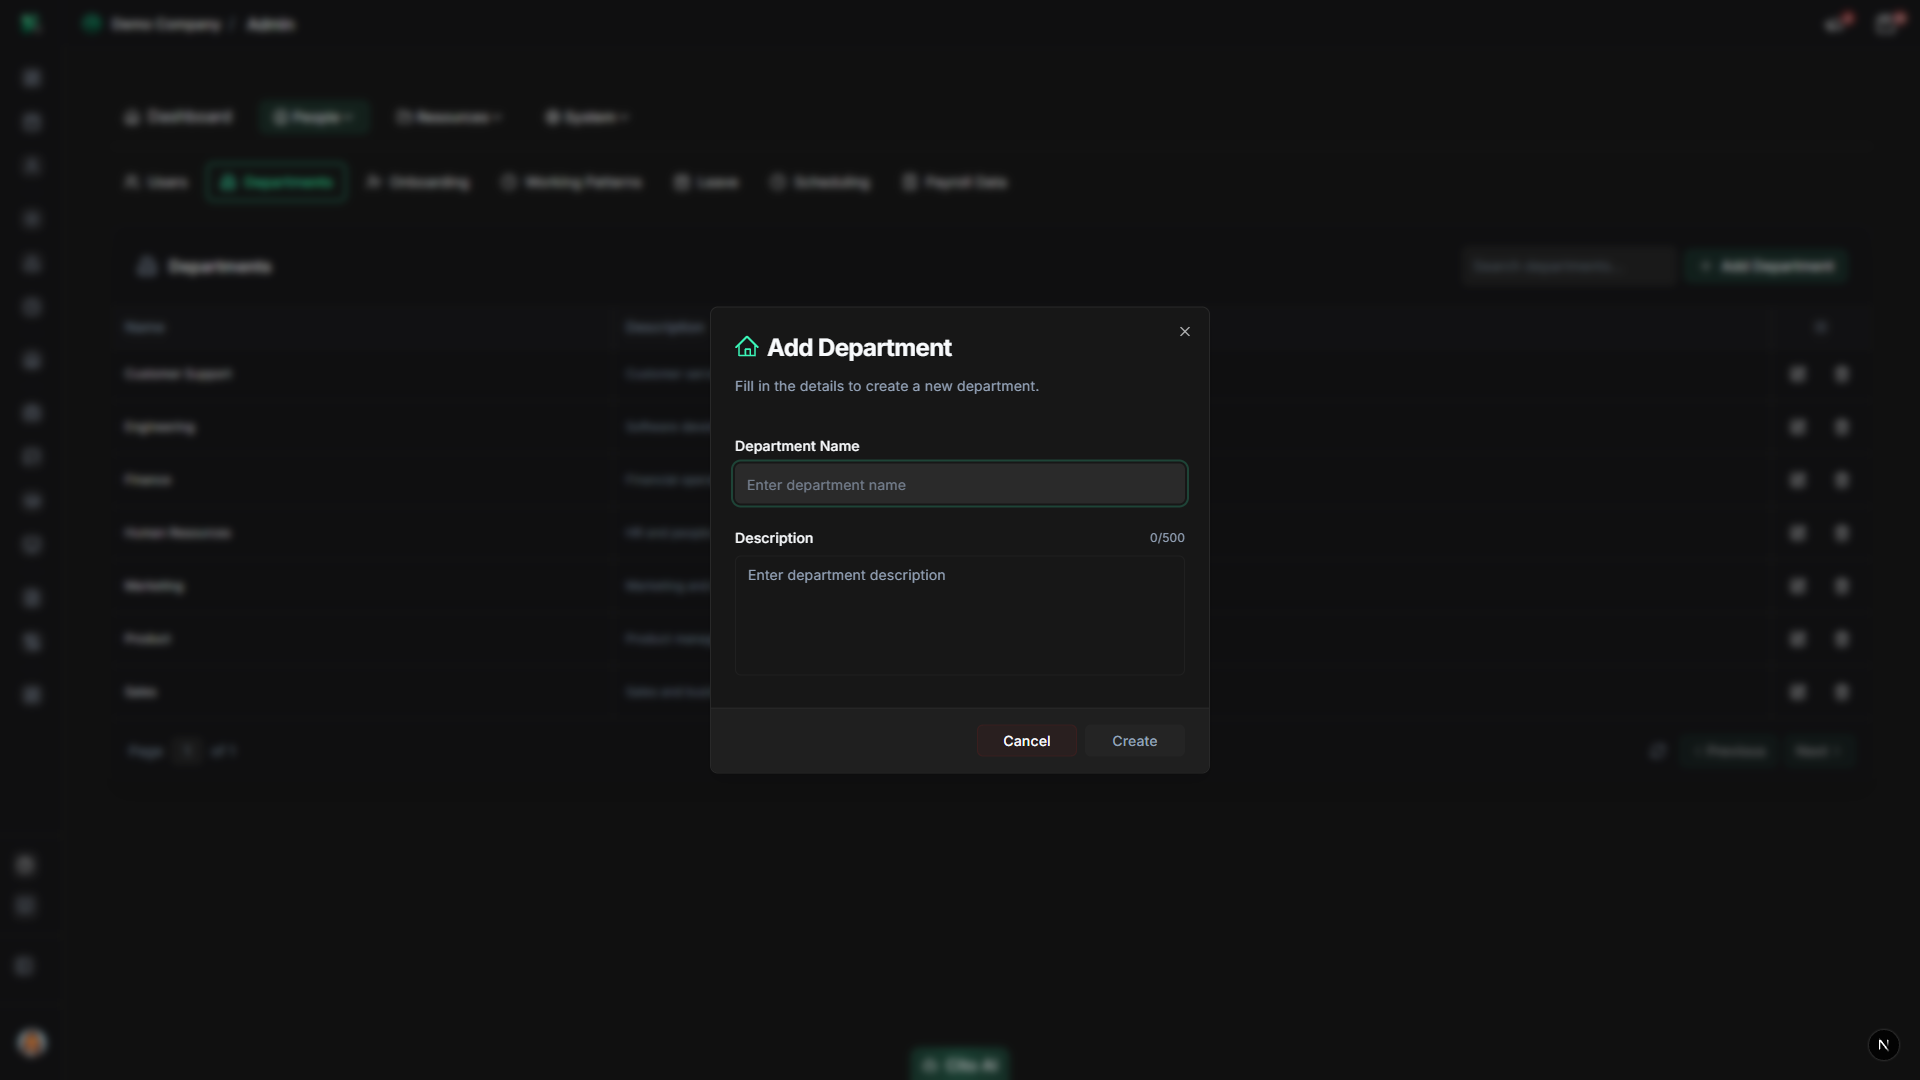
Creating a Department
Add a new department to your organization:
- On the Departments page, click the "Add Department" button (usually top right, may show as a plus icon)
- The department creation dialog will open
- Fill in the department details:
- Name - Enter the department name (required, e.g., "Engineering", "Sales", "HR")
- Description - Add an optional description of the department's purpose or function
- Click "Create Department" or "Save"
- A success message will confirm the department was created
- The new department will appear in the departments list
Tip
Create departments before creating users. This allows you to assign users to departments during user creation,
making the setup process smoother.
Editing a Department
Update department information:
- On the Departments page, find the department you want to edit
- Click the "Edit" button or icon next to the department
- The edit dialog will open with the current department information
- Update the department name or description as needed
- Click "Save" or "Update Department"
- The changes will be saved and reflected immediately

Deleting a Department
Remove a department from your organization:
- On the Departments page, find the department you want to delete
- Click the "Delete" button or icon next to the department
- A confirmation dialog will appear asking you to confirm the deletion
- Review the warning message carefully
- Click "Confirm" or "Delete" to proceed
- The department will be permanently removed
Warning
Deleting a department may affect users assigned to that department. Make sure to reassign users to
other departments before deleting a department, or be aware that users may need to be reassigned after deletion.
Searching Departments
Find specific departments quickly:
- On the Departments page, locate the search bar
- Type the department name (or part of the name) to search
- The table will filter to show only matching departments
- Clear the search to see all departments again

Assigning Users to Departments
Assign employees to departments:
- Navigate to Admin > Users
- Open a user's profile
- Navigate to the Employment section
- Click the Department dropdown
- Select the department from the list
- Click "Save" to assign the user to that department

Best Practices
- Create departments before creating users to streamline user setup
- Use clear, consistent department naming conventions
- Add descriptions to help identify department purposes
- Regularly review and update department information
- Consider your organizational structure when creating departments
Related Features
- Users - Assign users to departments during user creation or editing
- Organization - Departments are part of your organizational structure
- Employee Directory - Employees can filter the directory by department