Admin: Scheduling Management
Complete guide to creating shifts, managing shift templates, assigning employees to shifts, and configuring scheduling settings in CitoHR.
Overview
The Admin Scheduling section allows you to create and manage employee shifts, build reusable shift templates, assign employees to shifts, and view schedules in a calendar grid. This is essential for organizations that need to manage work schedules, especially for shift-based work, retail, healthcare, or hospitality industries.
Note
Prerequisites
- You must have ADMIN role to manage scheduling
- Scheduling is a Pro feature - ensure your organization has Pro subscription
- Users should be created before assigning them to shifts
Accessing Scheduling Management
- Log in to your CitoHR account with Admin credentials
- Click on your organization name in the header
- Select "People" from the admin menu
- Click "Scheduling" from the People dropdown
- Or navigate directly to /admin/scheduling
Scheduling Tabs
The Scheduling page has four main tabs:
- Scheduler - Weekly calendar grid view for creating and viewing shifts
- Templates - Create and manage reusable shift templates
- All Shifts - Table view of all shifts with filtering and bulk operations
- Settings - Configure scheduling preferences and defaults
Creating a Shift Template
Create reusable shift templates for common shift patterns:
- Navigate to the Templates tab
- Click the "Create" button (usually top right)
- The shift template creation dialog will open
- Fill in the template details:
- Template Name - Enter a descriptive name (e.g., "Morning Shift", "Evening Shift", "Weekend Shift")
- Start Time - Select the shift start time (e.g., 09:00)
- End Time - Select the shift end time (e.g., 17:00)
- Break Duration - Enter break time in minutes (optional)
- Description - Add optional notes about the template
- Click "Create" or "Save"
- The template will be saved and available when creating shifts
Tip
Creating a Shift from a Template
Create a shift using an existing template:
- Navigate to the Scheduler tab
- Click on a date/time slot in the calendar grid where you want to create a shift
- Or click the "Create Shift" button
- In the shift creation dialog, select a template from the Template dropdown
- The start time, end time, and break duration will be pre-filled from the template
- Adjust the Date if needed
- Optionally modify times or add notes
- Click "Create" to create the shift
- The shift will appear in the calendar grid
Creating a Shift Manually
Create a shift without using a template:
- Navigate to the Scheduler or All Shifts tab
- Click the "Create Shift" button
- Fill in the shift details:
- Date - Select the date for the shift
- Start Time - Select the shift start time
- End Time - Select the shift end time
- Break Duration - Enter break time in minutes (optional)
- Notes - Add any additional notes (optional)
- Click "Create" to create the shift
Assigning Employees to a Shift
Assign one or more employees to a shift:
- Navigate to the All Shifts tab
- Find the shift you want to assign employees to
- Click the "Assign" button or icon for that shift
- The assignment dialog will open
- Select employees from the list:
- Use checkboxes to select multiple employees
- Use the search bar to find specific employees
- Filter by department if needed
- Click "Assign" or "Save"
- The employees will be assigned to the shift
- You can also assign employees directly from the Scheduler tab by clicking on a shift
Editing a Shift
Update an existing shift:
- Navigate to the All Shifts tab or Scheduler tab
- Find the shift you want to edit
- Click the "Edit" button or click on the shift in the calendar
- Update any fields:
- Change the date, start time, or end time
- Modify break duration
- Update notes
- Click "Update" or "Save"
- The changes will be saved and reflected in the calendar
Deleting a Shift
Remove a shift:
- Navigate to the All Shifts tab
- Find the shift you want to delete
- Click the "Delete" button or icon
- A confirmation dialog will appear
- Review the warning message
- Click "Confirm" or "Delete" to proceed
- The shift will be permanently removed, and all employee assignments will be removed
Warning
Bulk Deleting Shifts
Delete multiple shifts at once:
- Navigate to the All Shifts tab
- Select multiple shifts using checkboxes
- Click the "Bulk Delete" or "Delete Selected" button
- A confirmation dialog will show how many shifts will be deleted
- Click "Confirm" to proceed
- All selected shifts will be deleted
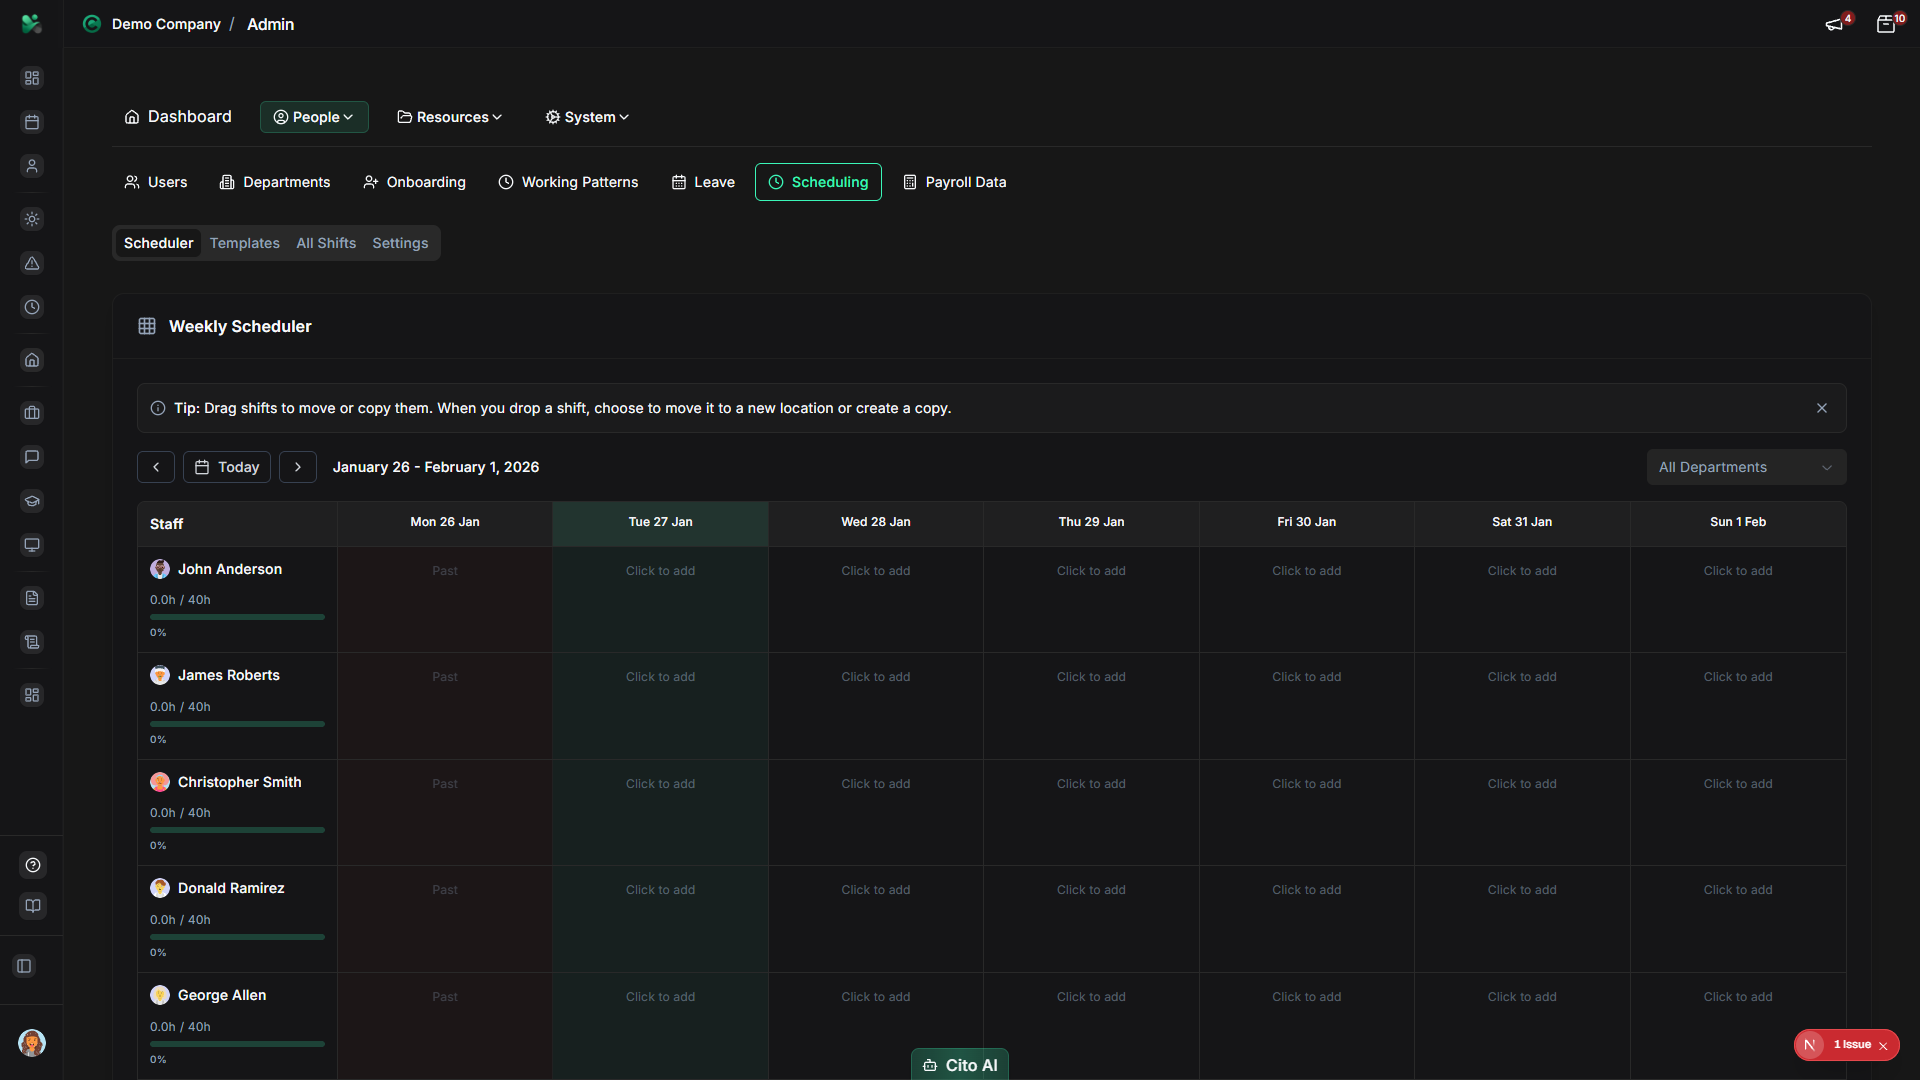
Viewing the Scheduler Grid
Use the weekly calendar view to see and manage shifts:
- Navigate to the Scheduler tab
- You'll see a weekly grid showing:
- Days of the week as columns
- Time slots as rows
- Shifts displayed as blocks in the grid
- Employee names shown on assigned shifts
- Use navigation controls to:
- Move to previous/next week
- Jump to today's date
- Change the view (if multiple views are available)
- Click on a shift block to view or edit it
- Click on an empty time slot to create a new shift
Configuring Scheduling Settings
Set default scheduling preferences:
- Navigate to the Settings tab
- Configure scheduling preferences:
- Default Shift Duration - Set default hours for new shifts
- Default Break Duration - Set default break time
- Week Start Day - Choose which day the week starts (Monday, Sunday, etc.)
- Time Zone - Set the time zone for scheduling
- Other organization-specific settings
- Click "Save Settings" to apply changes
Best Practices
- Create shift templates for common patterns to save time and ensure consistency
- Plan shifts in advance using the Scheduler grid view
- Assign employees to shifts as soon as they're created
- Use the All Shifts tab to filter and find specific shifts quickly
- Regularly review and update shifts as schedules change
- Communicate schedule changes to affected employees
- Use bulk operations for efficiency when managing many shifts
Related Features
- Users - Assign employees to shifts
- Working Patterns - Working patterns can inform shift scheduling
- Scheduling (Feature) - How employees view their schedules
- Payroll Data - Shifts can be used for payroll calculations